Theremin Design Project
Overview:
Spring 2025
For my junior design project, I formed a team with 3 other students and built a theremin: a musical instrument controlled with the wave of a hand. We split the project up into four “mini design projects”: antenna, oscillator, effects, and amplifier. My mini project was to design the audio amplifer for the theremin.
Theremin Design Plan:
The theremin’s pitch is controlled by a changing capacitance, and we can take advantage of the capacitative nature of the human body to control that pitch.
We planned on adding additional features to the theremin, like a waveform selector, envelope generator, and an effects chain.
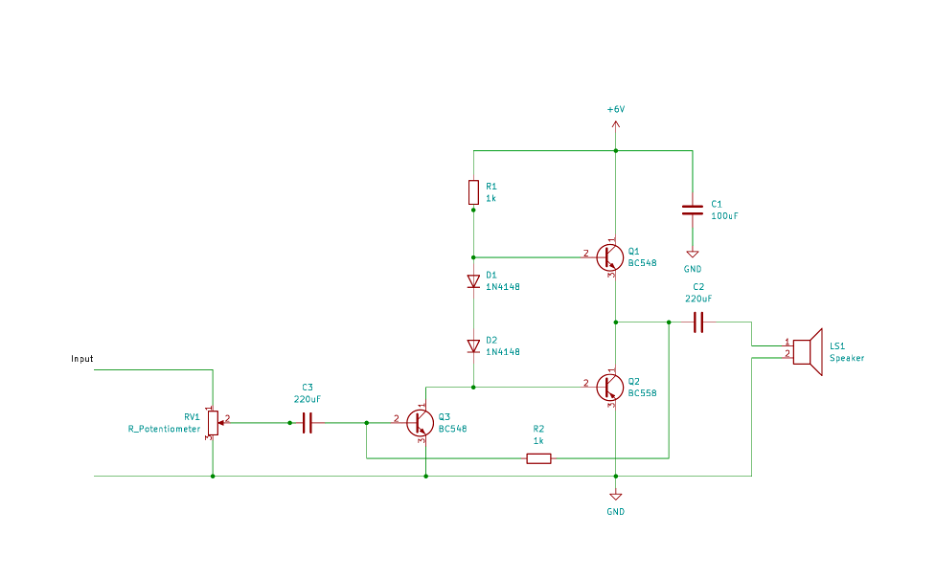
Amplifier Schematic:
After researching different types of amplifier classes, I decided to move forward with the Class AB amplifier because of its practicality and lack of distortion.
I created the schematic on the right from a combination of papers on Class AB amplifiers, and my own observations while prototyping on a breadboard.
Amplifier Final Design:
To finalize my design, I decided to solder the circuit to perfboard so it could be reliable moved when we assembled the theremin.
As a last minute change, I also added an LM386 audio amplifer chip because we were worried that the theremin’s output voltage would be lower than expected. This didn’t end up being the case, but better safe than sorry.
Final Demo and Slides:
In the end we were able to get the theremin functioning, and presented a working demo to the class. Unfortunately we didn’t have enough time to implement the waveform selector and envelope generator, but we successfully incorporated the tremolo effect. Although we had been working on separate topics throughout the semester, we maintained clear communication and understanding of each other’s mini projects to ensure the final assembly of the theremin would be successful.

Figure 2: Class AB Amplifier Schematic
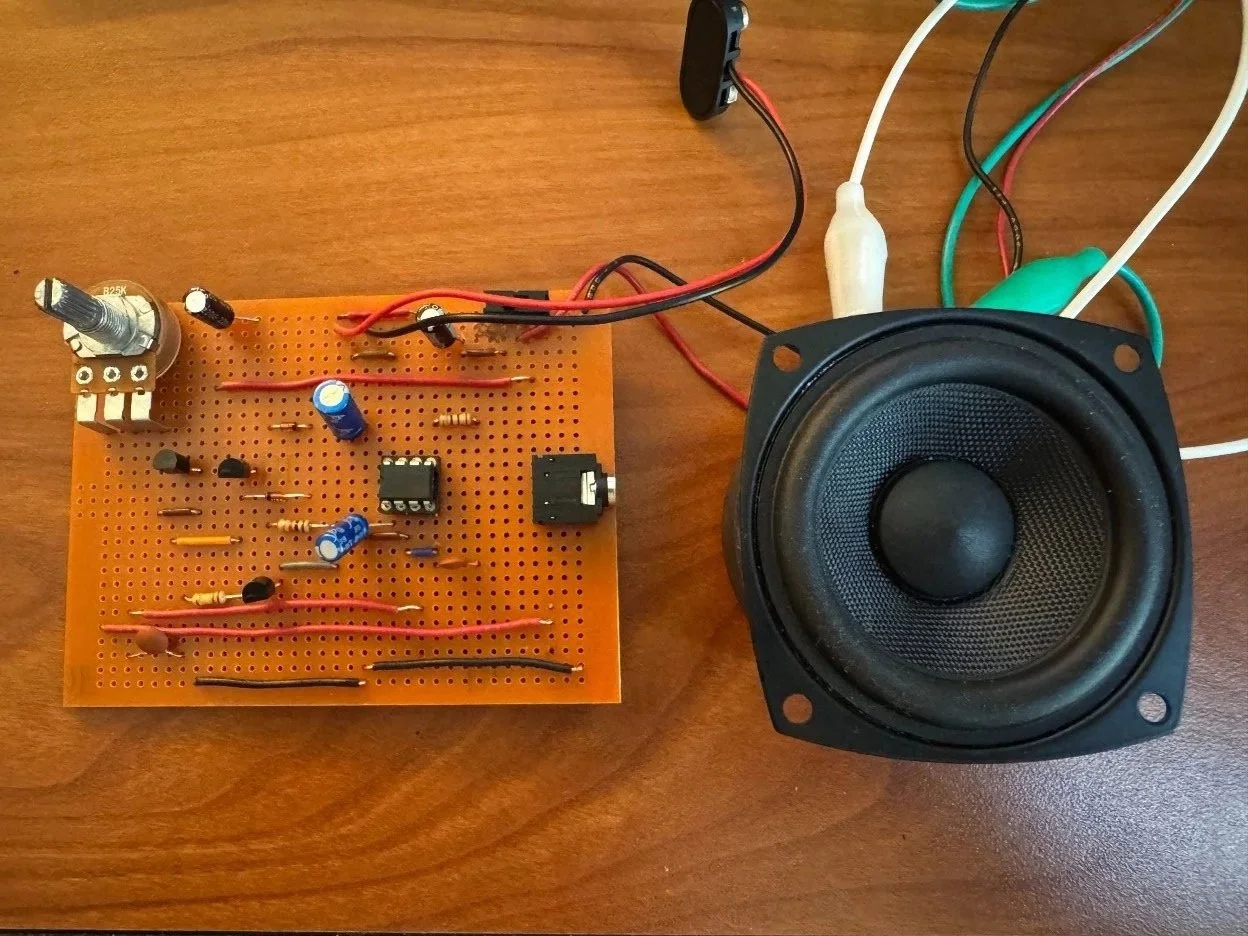
Figure 3: Amplifer on perfboard
Figure 1: Theremin Block Diagram